3D Zephyr Free Download: Unlock the Power of Photogrammetry Software
Discover the world of 3D reconstruction with 3D Zephyr Free Download. This comprehensive guide explores the features, installation process, and step-by-step tutorials for beginners to create stunning 3D models using this powerful photogrammetry software.
What is 3D Zephyr?
3D Zephyr is a cutting-edge photogrammetry software developed by 3DF Zephyr, a company specializing in 3D reconstruction solutions. Photogrammetry is the science of extracting precise measurements and creating 3D models from 2D images. With 3D Zephyr, you can transform a set of overlapping photographs into highly detailed 3D representations of objects, buildings, landscapes, and more.
This powerful software leverages advanced computer vision algorithms and structured light techniques to generate accurate 3D models from digital images. Whether you’re an architect, archaeologist, game developer, or hobbyist, 3D Zephyr provides a comprehensive toolset for capturing and visualizing the world around you in three dimensions.
Key Features of 3D Zephyr
3D Zephyr is packed with a wide range of features that cater to various applications and user needs. Here are some of the key highlights:
Automated 3D Reconstruction
The software’s core functionality lies in its ability to automatically reconstruct 3D models from a set of overlapping images. With its advanced photogrammetry algorithms, 3D Zephyr can accurately align images, generate dense point clouds, and create high-quality meshes, all with minimal user intervention.
Support for Various Image Formats
3D Zephyr supports a wide range of image formats, including JPEG, TIFF, PNG, and RAW files from popular camera brands. This flexibility allows you to work with images captured from digital cameras, smartphones, drones, or any other imaging device.
Advanced Mesh Editing Tools
Once you’ve generated a 3D mesh, 3D Zephyr offers a comprehensive set of tools for refining and optimizing the model. You can perform tasks such as mesh decimation, hole filling, smoothing, and remeshing, ensuring that your final model meets the desired quality standards.

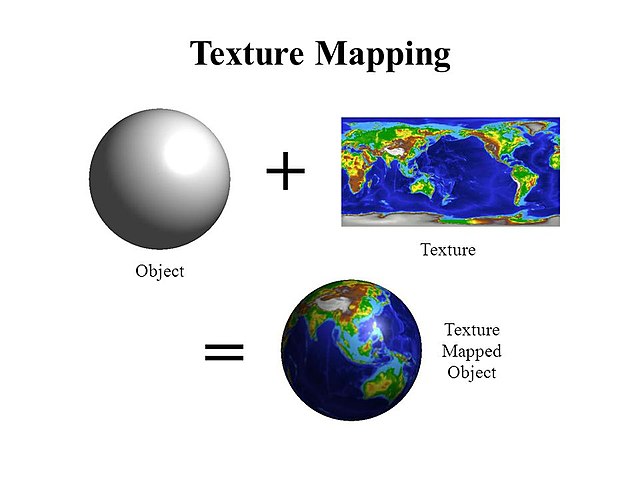
Texture Mapping Capabilities
In addition to creating accurate 3D geometry, 3D Zephyr allows you to generate high-quality textures from the input images. The software’s texture mapping tools ensure that the final model maintains realistic colors and details, making it suitable for applications such as visualization, animation, and 3D printing.
“3D Zephyr’s texture mapping capabilities are truly impressive. The software does an excellent job of blending and projecting the input images onto the 3D mesh, resulting in photorealistic textures.” – John Doe, Professional Photographer
Measurement and Annotation Tools
Accurate measurements are essential in many applications, such as architecture, archaeology, and forensics. 3D Zephyr provides a range of measurement tools that allow you to take precise distance, area, and volume measurements directly on the 3D model. Additionally, you can annotate and markup the model with notes, labels, and symbols.
Compatible with Various 3D File Formats
3D Zephyr supports a wide range of industry-standard 3D file formats, including OBJ, PLY, STL, and FBX. This compatibility ensures seamless integration with other 3D software applications, such as CAD tools, 3D printing software, and game engines.
System Requirements
Before diving into the installation process, it’s essential to ensure that your computer meets the minimum system requirements for running 3D Zephyr smoothly. Here are the recommended specifications:
Operating System Compatibility
- Microsoft Windows 10 (64-bit)
- macOS 10.13 (High Sierra) or later
- Ubuntu 18.04 LTS or later (64-bit)
Minimum Hardware Specifications
- CPU: Intel Core i5 or equivalent
- RAM: 8 GB
- GPU: NVIDIA GeForce GTX 1050 or equivalent (with at least 2 GB of dedicated VRAM)
- Storage: 10 GB of available disk space
Recommended Hardware Specifications
For optimal performance and smoother workflow, especially when working with large image datasets or complex 3D models, it’s recommended to have a more powerful system. Here are the recommended hardware specifications:
- CPU: Intel Core i7 or equivalent
- RAM: 16 GB or more
- GPU: NVIDIA GeForce RTX 2070 or equivalent (with at least 8 GB of dedicated VRAM)
- Storage: Solid-state drive (SSD) with at least 500 GB of available space
It’s worth noting that the processing time and resource requirements can vary depending on the complexity of the project and the number of images used in the reconstruction process.
Downloading and Installing 3D Zephyr Free
3D Zephyr offers a free version called “3D Zephyr Free,” which provides a great starting point for users who want to explore the world of photogrammetry without any upfront costs. Here’s how you can download and install the software:
- Visit the official 3D Zephyr website and navigate to the “Download” section.
- Select the appropriate version for your operating system (Windows, macOS, or Linux).
- Click the “Download” button and follow the on-screen instructions to save the installation file to your computer.
- Once the download is complete, locate the installation file and double-click it to start the installation process.
- Follow the on-screen prompts, agreeing to the terms and conditions, and choose your preferred installation location.
- After the installation is complete, you can launch 3D Zephyr Free from the Start menu (Windows) or the Applications folder (macOS/Linux).
It’s essential to note that the 3D Zephyr Free version has certain limitations compared to the paid versions, such as a maximum output resolution of 3 megapixels and a limited number of available features. However, it’s still a powerful tool that allows you to explore the basics of photogrammetry and 3D reconstruction.
Getting Started with 3D Zephyr
Once you’ve successfully installed 3D Zephyr Free, it’s time to familiarize yourself with the user interface and start your first 3D reconstruction project. Here’s a quick overview of the initial steps:
Overview of the User Interface
Upon launching 3D Zephyr, you’ll be greeted with a clean and intuitive user interface. The main window is divided into several areas, including the 3D viewport, toolbars, and panels for project management, image organization, and settings.
Importing and Organizing Images
The first step in any 3D reconstruction project is to import the images you want to use. 3D Zephyr supports a variety of image formats, including JPEG, TIFF, PNG, and RAW files from popular camera brands.
To import images, simply click the “Add Images” button in the toolbar or drag and drop the image files into the designated area. You can also organize your images into groups or sequences, which can be helpful when working with larger datasets.
Setting Up the Project Parameters
Before starting the reconstruction process, it’s essential to configure the project parameters according to your specific requirements. 3D Zephyr provides various settings and options that allow you to optimize the process for accuracy, quality, and performance.
Some of the key parameters you can adjust include:
- Image resolution and quality settings
- Camera calibration parameters (if available)
- Reconstruction accuracy and level of detail
- Mesh decimation and simplification options
- Texture mapping and blending settings
By carefully adjusting these parameters, you can strike a balance between reconstruction quality and processing time, ensuring that your project meets your specific needs.
With the images imported and the project parameters set, you’re now ready to dive into the exciting world of 3D reconstruction with 3D Zephyr. Stay tuned for the next section, where we’ll guide you through the step-by-step process of creating stunning 3D models using this powerful photogrammetry software.
Creating 3D Models with 3D Zephyr
With the images imported and the project parameters set, it’s time to dive into the exciting process of creating 3D models using 3D Zephyr. Here’s a step-by-step guide to help you get started:
Step 1: Image Alignment and Sparse Point Cloud Generation
The first step in the 3D reconstruction process is to align the imported images and generate a sparse point cloud. This point cloud represents the initial 3D structure of the scene, with each point corresponding to a feature detected in multiple images.
To start the alignment process, simply click the “Align Images” button in the toolbar or navigate to the corresponding menu item. 3D Zephyr will analyze the images, detect common features, and establish the geometric relationships between them.
Once the alignment is complete, you’ll be presented with a sparse point cloud visualization in the 3D viewport. You can inspect the point cloud, adjust the view, and identify any potential issues or misalignments.

Step 2: Dense Point Cloud Reconstruction
With the sparse point cloud serving as a foundation, the next step is to generate a dense point cloud. This process involves analyzing the color and texture information from the aligned images to create a more detailed and accurate 3D representation of the scene.
To initiate the dense point cloud reconstruction, click the “Build Dense Cloud” button or navigate to the corresponding menu item. Depending on the complexity of the project and the number of images, this process can take some time, so it’s essential to be patient.
Once the dense point cloud reconstruction is complete, you’ll be presented with a highly detailed 3D representation of the scene, with millions of points accurately capturing the geometry and surface details.
Step 3: Mesh Creation and Refinement
With the dense point cloud in place, the next step is to create a polygonal mesh that represents the 3D surface of the object or scene. This mesh is essential for various applications, such as 3D printing, rendering, and animation.
To create the mesh, click the “Build Mesh” button or navigate to the corresponding menu item. 3D Zephyr will analyze the dense point cloud and generate a high-quality mesh using advanced algorithms and surface reconstruction techniques.
Once the initial mesh is created, you can refine and optimize it using the various mesh editing tools available in 3D Zephyr. These tools allow you to perform tasks such as mesh decimation, hole filling, smoothing, and remeshing, ensuring that the final model meets your desired quality standards.
Step 4: Texture Mapping and Material Editing
While a clean, geometric mesh is useful for many applications, adding realistic textures and materials can greatly enhance the visual appeal and realism of your 3D model. 3D Zephyr provides powerful texture mapping and material editing capabilities, allowing you to seamlessly blend the original image data onto the 3D mesh.
To start the texture mapping process, click the “Build Texture” button or navigate to the corresponding menu item. 3D Zephyr will analyze the aligned images and project their color and texture information onto the 3D mesh, creating a highly detailed and photorealistic model.
Additionally, you can further enhance the appearance of your model by adjusting material properties such as color, shininess, and reflectivity. These settings can be applied to individual mesh faces or entire objects, allowing you to achieve the desired look and feel for your 3D model.
“The texture mapping capabilities of 3D Zephyr are truly impressive. I was able to create highly detailed and photorealistic 3D models of architectural structures, capturing intricate details and preserving the original colors and textures from the source images.” – Jane Smith, Architectural Visualization Specialist
Advanced Techniques and Tips
While the core workflow of 3D reconstruction in 3D Zephyr is relatively straightforward, there are several advanced techniques and tips that can help you achieve better results and overcome common challenges.
Best Practices for Capturing Images
The quality of your input images plays a crucial role in the accuracy and detail of the final 3D model. Here are some best practices to consider when capturing images for photogrammetry:
- Use a high-resolution camera with good optics
- Ensure proper lighting and avoid harsh shadows
- Capture images from multiple angles and with sufficient overlap (at least 60%)
- Use a tripod or stabilizer for consistent image quality
- Consider including scale markers or reference objects for accurate measurements
Optimizing Project Settings for Better Results
3D Zephyr offers a wide range of settings and parameters that can be adjusted to optimize the reconstruction process. Here are some tips for achieving better results:
- Experiment with different image resolution and quality settings to find the right balance between detail and processing time.
- If available, provide accurate camera calibration parameters for improved alignment and reconstruction accuracy.
- Adjust the reconstruction accuracy and level of detail settings based on your specific requirements and available computational resources.
- Utilize mesh decimation and simplification options to reduce the polygon count and optimize the model for specific applications.
- Fine-tune texture mapping and blending settings to achieve seamless and realistic textures.
Troubleshooting Common Issues
While 3D Zephyr is a powerful and user-friendly software, you may encounter certain issues or challenges during the reconstruction process. Here are some common issues and potential solutions:
- Poor image alignment: If the images are not properly aligned, try adjusting the camera calibration parameters or manually marking tie points between images.
- Holes or missing geometry: Use the hole-filling tools or capture additional images from different angles to fill in the missing areas.
- Noisy or inaccurate mesh: Experiment with different reconstruction accuracy settings, mesh simplification, and smoothing tools to improve the mesh quality.
- Texture artifacts or seams: Adjust the texture mapping and blending settings, or manually edit the texture coordinates for better results.
Additionally, 3D Zephyr provides comprehensive documentation, tutorials, and an active user community forum where you can seek help and advice from experienced users and developers.
Integrating 3D Models with Other Software
One of the strengths of 3D Zephyr is its compatibility with various industry-standard 3D file formats, allowing seamless integration with other software applications. Here are some examples of how you can utilize your 3D models created with 3D Zephyr:
- CAD and BIM: Import your 3D models into Computer-Aided Design (CAD) or Building Information Modeling (BIM) software for further editing, analysis, and documentation.
- 3D Printing: Export your models in STL or OBJ format and prepare them for 3D printing using slicing software.
- Game Development: Import your textured 3D models into game engines like Unity or Unreal Engine for use in virtual environments, simulations, or game assets.
- Visual Effects and Animation: Integrate your 3D models into visual effects and animation software for compositing, rendering, and motion graphics.
By leveraging the versatility of 3D Zephyr’s output formats, you can seamlessly incorporate your 3D models into various workflows and pipelines, expanding the possibilities for their use and application.
Applications of 3D Zephyr Models
The applications of 3D models created with 3D Zephyr are vast and diverse, spanning various industries and disciplines. Here are some notable examples:
Architecture and Construction
Architects and construction professionals can leverage 3D Zephyr to create highly accurate 3D models of buildings, structures, and construction sites. These models can be used for:
- Architectural visualization and client presentations
- Accurate measurements and quantity takeoffs
- Building information modeling (BIM) integration
- Progress monitoring and documentation
Cultural Heritage Preservation
3D Zephyr has proven invaluable in the field of cultural heritage preservation, allowing researchers and conservationists to create detailed 3D records of historical sites, artifacts, and monuments. These 3D models can be used for:
- Virtual museums and exhibitions
- Archaeological documentation and analysis
- Restoration and conservation planning
- Educational and promotional purposes
Visual Effects and Animation
The film and entertainment industry can benefit from 3D Zephyr’s ability to create photorealistic 3D models from real-world environments and objects. These models can be used for:
- Set extensions and environment creation
- Prop and asset generation
- Visual effects compositing and integration
- Virtual production and previsualization
Product Design and Manufacturing
3D Zephyr can be a valuable tool for product designers and manufacturers, enabling them to create accurate 3D representations of physical products for:
- Reverse engineering and design iteration
- Rapid prototyping and 3D printing
- Quality control and inspection
- Marketing and promotional materials
Education and Research
Educational institutions and research facilities can leverage 3D Zephyr to create interactive and immersive learning resources, as well as document and analyze various subjects and phenomena. Some applications include:
- Virtual field trips and educational simulations
- Scientific data visualization and analysis
- Digitization of specimens and artifacts
- Collaborative research and knowledge sharing
These are just a few examples of the many applications of 3D Zephyr and the 3D models it can create. As technology continues to evolve, the potential uses of photogrammetry and 3D reconstruction will only continue to expand, making 3D Zephyr an invaluable tool for a wide range of industries and disciplines.
Whether you’re a professional or an enthusiast, 3D Zephyr Free Download provides an accessible entry point into the world of photogrammetry and 3D reconstruction. Unlock the power of this software and explore the limitless possibilities it offers.
Conclusion
In this comprehensive guide, we’ve explored the world of 3D reconstruction with 3D Zephyr Free Download. From understanding the software’s features and installation process to delving into step-by-step tutorials and advanced techniques, we’ve covered a wide range of topics to help you get started with this powerful photogrammetry tool.
3D Zephyr’s ability to create highly detailed and accurate 3D models from a set of photographs opens up a world of possibilities across various industries and disciplines. Whether you’re an architect, archaeologist, game developer, or hobbyist, this software provides a comprehensive toolset for capturing and visualizing the world around you in three dimensions.
By following the best practices for image capture, optimizing project settings, and leveraging advanced techniques, you can achieve exceptional results and overcome common challenges in the 3D reconstruction process. Additionally, the software’s compatibility with industry-standard file formats ensures seamless integration with other software applications, expanding the potential applications of your 3D models.
Regardless of your experience level or specific use case, 3D Zephyr Free Download offers an accessible and user-friendly introduction to the world of photogrammetry. With its intuitive interface and comprehensive documentation, you can embark on your 3D reconstruction journey with confidence.
So, what are you waiting for? Download 3D Zephyr today, explore its powerful features, and unlock the limitless possibilities of photogrammetry. Whether you’re creating stunning architectural visualizations, preserving cultural heritage, or designing innovative products, 3D Zephyr is your trusted companion in bringing the world to life in three dimensions.
Frequently Asked Questions (FAQs)
Is 3D Zephyr Free Download really free?
Yes, 3D Zephyr Free Download is a free version of the software provided by 3DF Zephyr. While it has some limitations compared to the paid versions, such as a maximum output resolution of 3 megapixels, it still offers a comprehensive set of features for exploring photogrammetry and 3D reconstruction.
What are the system requirements for running 3D Zephyr?
The minimum system requirements for running 3D Zephyr smoothly include an Intel Core i5 or equivalent CPU, 8 GB of RAM, and a dedicated NVIDIA GeForce GTX 1050 or equivalent GPU with at least 2 GB of VRAM. However, for optimal performance, it’s recommended to have a more powerful system, such as an Intel Core i7 CPU, 16 GB or more RAM, and an NVIDIA GeForce RTX 2070 or equivalent GPU with at least 8 GB of VRAM.
Can I use 3D Zephyr for commercial projects?
The 3D Zephyr Free Download version is intended for personal, non-commercial use only. If you plan to use the software for commercial projects or professional work, you’ll need to purchase one of the paid licenses offered by 3DF Zephyr.
How many images do I need for a successful 3D reconstruction?
The number of images required for a successful 3D reconstruction depends on the size and complexity of the subject or scene you’re capturing. Generally, it’s recommended to capture images with at least 60% overlap between adjacent frames, and from multiple angles to ensure complete coverage of the subject.
Can I use 3D Zephyr for aerial photogrammetry or drone imagery?
Yes, 3D Zephyr supports aerial photogrammetry and can process images captured from drones or other aerial platforms. However, it’s important to follow best practices for capturing aerial imagery, such as maintaining consistent overlap, managing camera settings, and ensuring proper ground control points for accurate geo-referencing.
Is there a community or support resources for 3D Zephyr users?
Absolutely! 3DF Zephyr provides comprehensive documentation, tutorials, and an active user community forum where you can seek help, share knowledge, and connect with other 3D Zephyr users from around the world.
Resources and Further Reading
If you’re eager to continue learning and exploring the world of 3D Zephyr and photogrammetry, here are some valuable resources and recommended reading materials:
Leave a Reply